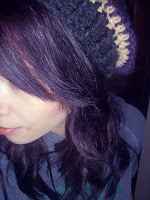
 Another day, another hat. Okay, so I've officially tired of making hats in just single crochet. I needed to do something different before dying of boredom. So, I did this slouch hat in single crochet, double crochet, front post double crochet and back post double crochet. For this hat, I used Vanna's Choice yarn, which I was VERY skeptic about using... well, because it's Vanna's yarn. Actually the yarn is gorgeous and extremely soft. The variety of colors are amazing. I was so excited to finish this hat and actually have a "ribbed" brim. The hat is more fitted and stretchy. I have attempted writing a pattern for this, and this is my first ever pattern... I'm going to post more pictures of my hat and the pattern will be located below.
(Sorry about the pictures, my hair is slightly purple, and it comes out dramatically in pictures.)
Gauge: 4 inches = 12 stitches, 15 rows
Hook: H = 5.00mm (My head size is 20.5 inches, if your head size is 21 inches or less - I would use an H, if above I would use an I)
Yarn: Vanna's Choice (Color A= Charcoal, Color B= Purple, Color C= Pearl Mist)
Abbreviations:
Rnd: round
Sc: single crochet
dc: double crochet
fpdc: front post double crochet
bpdc: back post double crochet
Ss: slip stitch
FO: Fasten off
*Try using a marker and working in rounds (it makes life much easier)*
With " Color A", magic circle (or by chaining 2 and joining to form ring), work 8sc in ring (8)
R1: 2sc in each sc around (16)
R2: *sc, 2sc in next sc* repeat around (24)
R3: *3sc (sc, sc, sc), 2sc in next sc* repeat around (32)
*Switch to Color B*
R4: *4sc (sc, sc, sc, sc), 2sc in next sc* repeat around (40)
R5: *5sc (sc, sc, sc sc, sc), 2sc in next sc* repeat around (48)
*Switch to Color C*
R6: *6sc, 2sc in next sc* repeat around (56)
R7: *7sc, 2sc in next sc* repeat around (64)
*Switch to Color A*
R8: *8sc, 2sc in next sc* repeat around (72)
R9: *9sc, 2sc in next sc* repeat around (80)
R10: sc in each stitch around (80)
R11: sc in each stitch around (80)
*Switch to Color B*
R12: sc in each stitch around (80)
R13: sc in each stitch around (80)
*Switch to Color C*
R14: sc in each stitch around (80)
R15: sc in each stitch around (80)
*Switch to Color A*
*NOTE: I crochet very loosely, by now if I measure from the center of the magic ring to row 11, it's 4 inches. If it isn't quite that big yet, I would suggest adding more rows of just SC, until it's about 4 inches, or how ever big you want it before DC*
R16: sc in each stitch around (80)
R17: sc in each stitch around (80)
R18: dc in each stitch around (80)
R19: dc in each stitch around (80)
*Switch to Color B*
R20: dc in each stitch around (80)
R21: dc in each stitch around (80)
*Switch to Color C*
R22: *2dc, dc2tog* repeat around (60)
R23: dc in each stitch around (on this row I decreased however many stitches I needed to make the brim of my hat more fitted. I decreased by 5 more stitches, making my stitch count (55), everyone is different)
*Switch to Color A*
(This is the start of the brim, if it is still not long enough for you, just add more double crocheted rows, you will add length very quickly)
R24-28: *1fpdc, 1bpdc* repeat around
FO
(remember to fpdc into the fpdcs, and bpdc into the bpdcs)
If you would like a longer brim, just continue with the *1fpdc, 1bpdc* around until it is to your liking.
I hope this patterns wasn't too hard to understand. It is my first, so sorry for any inconvenience it may have caused. If you have any questions, feel free to leave me a comment, or send me an email at zcrashcreations@gmail.com.
Thanks for reading!
Kristina


